
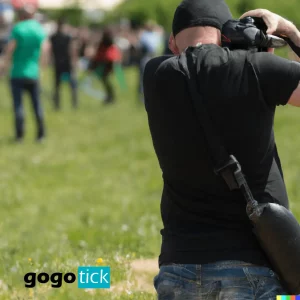
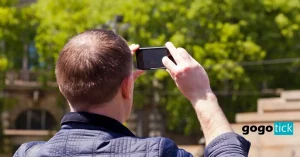
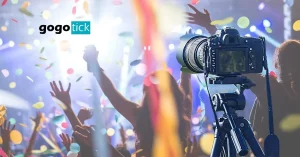
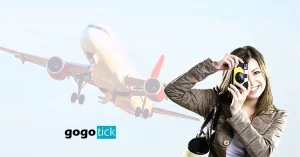
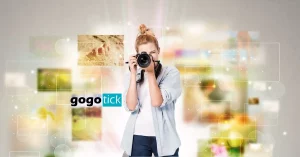
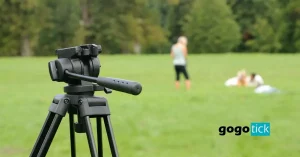
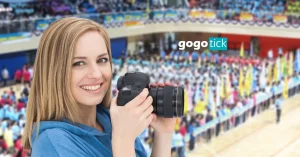
Event Photography is a term for a huge variety of opportunities. When choosing to shoot events, the list is endless. You could be asked to shoot a Wedding, Birthday party, Christening, concert, corporate event–the list goes on! One thing is for sure, the venue, lighting, and requirements are always subject to change. No two events are the same, and therefore a lot of careful consideration must go into the preparation.
What kinds of things should you be considering when shooting an event? Although there are many technical aspects that need to be thought about, preparation is critical. Technical concerns include
- Shooting Format
- Lighting
- Aperture
- ISO
- Shutter Speed
- Lenses
- Shooting Mode
We’re going to be taking you on a journey through the most important things to consider when shooting events.
What Factors Should You Consider When Shooting Events?
- Preparation
Preparation is the most vital part of any shoot that you’re hired for. In the time running up to the shoot, you should be taking steps to prepare yourself, getting to know your camera, and using it in similar environments to where you will be shooting. There are many things to consider. However, if you take the time to fully prepare yourself, you will rule out the possibility of any slip-ups happening on the day of the shoot.
One step you can take before attending the shoot is to visit the venue and familiarize yourself with the surroundings. Doing this enables you to:
- test out lighting
- find great camera angles in advance
- search for the most eye-catching backdrops.
You can also take this time to pick the brains of any employees who may have some great tips. Quite often, the staff at the venue will be able to tell you the areas most used by other photographers to position themselves or their subjects.
Employees sometimes also come up with other great places that you may never have known about. I myself have had employees sneak me up to secret indoor balconies and other fantastic shooting spots, that both myself, and photographers in the past had no knowledge of!
Use this time to take some practice shots. One of the best tips we can give you when shooting any type of event is to head down to the venue with your camera and get snappy. Test out all the features, mess around with the aperture, ISO, shutter speed and decide what mode you would prefer to have your camera on.
If possible, take someone with you. Take a friend or family member to the venue and ask them to stand in certain areas that you will be shooting, so your camera has a subject to focus on. Ask them to move around, so you can test the shutter speed settings based on the lighting in the venue (we will discuss this shortly). This will make the camera settings you choose in the practice run more reliable on the day of the actual event.
Figure out what works best for you and write it down. Don’t rely on your memory to remember the most optimal settings for that perfect shot. Take a notepad and write everything down, save it to the notes in your phone, or take photos of the display settings on your camera screen.
Remember to get yourself into a good headspace mentally, before going to your shoot. Check out this video by Jared Polin:
- Shooting Formats
Image formats are a tricky topic to explain. However, here is the basic rule for which format to set your camera to: if you’re a professional, ALWAYS shoot in RAW. There are so many advantages to using RAW over JPEG. Below we’ve listed the advantages of shooting in RAW:
Quality
RAW format produces a higher quality image every time. In simple terms, RAW isn’t actually an image file like we know JPEG to be. It is a method in which your camera saves all of the data it can find the moment you shoot the image and keeps hold of it until you edit and export it to a specific file type. As a result of this, you are able to produce an image that is of a very high quality.
RAW format is a lot larger than JPEG as it is uncompressed, which can be a disadvantage. However, the difference in quality between them both makes buying extra storage completely worth it. As long as you make sure you’re stocked up on Compact Flash or SD Cards (depending on what your camera is compatible with), and you have a decent-sized external hard drive to store the images on, this won’t be an issue.
Shooting in JPEG means you lose a high amount of image detail and quality. This can result in images looking grainy, pixelated, and flat. Once you take a photo in JPEG, you can’t add quality, or fix pixelation. Therefore, we highly recommend that you disregard JPEG for professional shooting.
Colors
Here’s a fun fact: Shooting in RAW gives you the option to capture 68 billion more colors than shooting in JPEG. When you capture an image in RAW, it saves all of the data into the image, including all of the possible colors and tones. JPEG does capture a variety of colors. However, it is very limited as it disregards the rest due to the decompression of the file.
RAW allows you to capture brighter images, which gives you a better overall tonal quality with increased dimension, highlights, and shadows.
Artistic Control
Because all of the data you could possibly need is saved into the image, RAW grants you full artistic control. What we mean by this is, because you’re capturing an image of higher quality, with increased colors, tones, and pixels you have more to work with in post-production.
RAW allows you the ability to fix things that you would have no control over with a JPEG file. You are able to make changes to overexposed or underexposed images, bringing back the details that would be lost forever with JPEG. Once you have lost detail in a JPEG file, there is no way of reobtaining it.
Using the RAW setting on your camera can offer you so much more leeway both when capturing the image and during the editing process.
Want to learn more about RAW files? Tony & Chelsea Northrup give some amazing information and examples: RAW vs. JPEG:
- Lighting
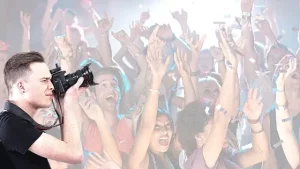
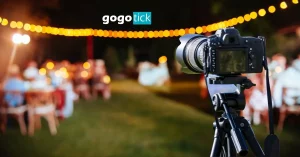
Lighting is one of the most key factors in a shoot, especially when it comes to Event Photography. Shooting events usually means you’re going to be expected to photograph in low light conditions, which is a tricky skill to master. However, there are some ways around this.
Since you are most likely going to be shooting in an indoor environment, think about the equipment you could potentially bring with you. Always bring lighting along when you can – even if you may not end up using it. You don’t want to be stuck in a low light situation, scrambling around your camera settings, in fear of not capturing anything worth keeping.
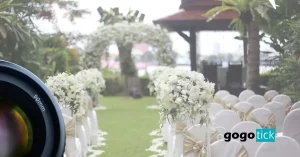
Try to stay away from On-Camera Flashes. As easy and efficient as they seem, even the most skilled photographer can have trouble capturing an image without it looking harsh, flat, and overexposed. An Off-Camera Flash is definitely a more effective way of capturing a high-quality image in low light. You can position these strategically around the room, to benefit you composition-wise. Try positioning one flash behind the subjects, and one behind yourself for the best lighting in events such as Wedding Receptions (mainly the first dance and the dancefloor in the evening), and parties.
Another option would be to bring along a continuous light source, such as a softbox. These are handy to set up around the room. However, be careful where you place them. Softboxes can be bulky and take up quite a bit of space. If you’re not careful about where you position them, they can be a hazard to guests–especially small children and guests who’ve had a bit too much to drink.
If you’re thinking about bringing lighting with you to the event, make sure you’re mindful of what the event is and whether an exterior light source would distract from the entertainment or ceremony. For example, a softbox may not be of use at a party or concert where the lighting needs to be low. An off-camera flash would also be a huge distraction at a church ceremony such as a Wedding or a Christening.
If you’re not sure if extra lighting would be permitted at an event, ask the venue owner or events manager. The last thing you want is to get into trouble on the night. If lighting is not permitted or would be of poor taste, take advantage of and make creative and artistic use of the lighting that is available. Spend some time online, looking at shots in similar lighting situations by other photographers, to give yourself inspiration. Or go to the venue and practice.
Some other tips when it comes to low lighting are to use the lowest possible f/stop on your camera, select your lens carefully, and think about things such as Aperture and Shutter Speed. We’ll be delving to these shortly.
Photographer Peter McKinnon gives us some amazing tips on shooting in low-light conditions, check out his video:
- Aperture and F/stop
The technical description of aperture is extremely confusing, but here’s the simplified definition–aperture describes the hole in your camera that lets in light when capturing an image. If you look inside the lens, you will see blades which will move depending on the f/stop you are using.
Quite often, you will hear photographers talking about “opening up,” which means increasing the aperture when capturing a shot, or “stopping down,” which means reducing the aperture size. How do you increase or decrease the aperture when capturing an image, you may ask? You do this by changing the f/stop.
When you move the f/stop number down (“opening up”) on your camera display, this makes the hole larger, which increases the amount of light that can enter through the lens. Therefore, when you capture an image and look back at it on the screen, it will be brighter. When you move the f/stop number up (“stopping down”) on your camera display up, it decreases the size of the hole, which decreases the amount of light that can enter through the lens, making the image darker.
It is a little confusing, but the main part to remember is: If you move the f/stop number down, the image will become brighter. If you move the f/stop number up, the image will become darker.
In an event, you will most likely be faced with low light conditions. If this is the case, increase your aperture. The lower the f/stop number on your display in a dimly lit room, the better. Try and let as much light in through the lens as possible, and then use your other camera settings to further increase brightness.
Still struggling with aperture? Here’s an amazing explanation by Benjamin Jaworskyj
- ISO
When working in a low light condition, you will definitely be reaching for the ISO dial on your camera.
ISO basically means how sensitive your camera’s sensor is to light. Playing with the ISO in the camera settings affects how much light is captured by the sensor, and therefore affects the exposure of the overall image. Moving the ISO down will make the sensor less sensitive to light, bringing down the exposure. Moving the ISO up will make the sensor move sensitive to light, increasing the exposure of the image.
If you are shooting an event that is dimly lit and you have decreased your f/stop to the minimum setting, the next step you should take is to increase your ISO. Make sure to take some test shots before cranking up the dial, because one downside to using very high ISO settings is that it can result in grainy shots. The higher the ISO, the more likely you are to increase grain and noise in your images, which is something you really want to avoid when shooting professionally – unless that’s the style you’re going for.
So increase your ISO, but also take into consideration that once grain appears in an image you’ve captured, it’s impossible to get rid of it completely. Be mindful that you can always adjust the exposure and tones on your image in post-production to a certain extent – providing you are shooting in RAW – so your image doesn’t have to be at peak brightness at the moment of capture. It’s better to take an image that is ever so slightly too dark and increase the exposure, shadows, highlights, and tones in Lightroom or Photoshop than take an image that is brighter but extremely grainy.
Here are some extra ISO tips from Joshua Cripps Photography:
- Shutter Speed
Some photographers are unaware of the importance of shutter speed. However, it is vital when shooting Event Photography.
The shutter speed refers to how slowly or quickly the shutter on your camera closes, in order to capture a fast-moving subject, or to increase the brightness of an image. The longer the shutter on your camera is open, the more light is exposed to the camera sensor, resulting in a brighter image. The faster the shutter on your camera closes, the less light is exposed to the camera sensor, and the darker the image will be.
As well as lighting, shutter speed can be altered depending on whether you are capturing images of a slow or fast-moving subject. In event photography, the majority of your subjects will be moving more quickly and spontaneously. For example, if you were shooting photographs for a party where people were dancing, you would need a higher shutter speed setting to make sure the subjects in the image don’t have motion blur. If you’re shooting a concert, the same rule applies.
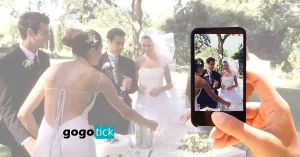
If you’re shooting a wedding, the shutter speed may vary depending on what point in the wedding you are shooting. Posed group shots wouldn’t need a quick shutter speed, as the subjects are standing still. However, the ceremony and wedding reception would need a faster shutter speed to make sure the quality of the moving subjects are intact, and the image is crisp and sharp.
When choosing your shutter speed based on lighting conditions, make sure you take some test shots of a moving subject to check if you will have any motion blur issues. The aim is to let as much light into the camera sensor as possible while keeping the subjects sharp. We recommend keeping your shutter speed between 1/100 and 1/200 in events where people will be moving around a lot. However, you can practice this and decide what works best for you.
Need some examples? Check out this video:
- Lenses
When it comes to lenses in low lighting environments, you want to choose a lens with the lowest possible f/stop (as we discussed earlier).
Try and get your hands on a lens with the maximum lowest f/stop of 2.8. If you can, go one better and try and get yourself one with the smallest f/stop of 1.4 (or lower!). The lower the smallest f/stop of your lens, the more light you can let in, and therefore the more easily your camera can manage in a darker setting.
I personally use a 50mm Sigma Art with an f/stop of 1.4 to shoot a range of things from events to portrait shoots and more. Keeping the f/stop at 1.4 when shooting events allows me to worry less about lighting, as all I have to do is bump up the ISO depending and manage my shutter speed, depending on how much more light I need.
The only downside to purchasing a lens with a smaller f/stop number is the price. Basically, the better the lens manages low light conditions, the more expensive it is. You can still find affordable lenses with lower f/stops. However, if you’re looking for something specific like a Telephoto Lens with a small f/stop, you’ll be paying a small fortune.
Photographer Jona tells us his favorite lenses to use when shooting an event:
- Shooting Mode
There are multiple different shooting mode options on a DSLR camera, and it can be difficult to know exactly which one is the best option for you. Here are the shooting modes most cameras have to work with:
- Auto
- Aperture-Priority (AV)
- Shutter Speed Priority (TV)
- Manual
What mode you use depends on both the event and your knowledge and experience with your DSLR.
If you find yourself struggling to quickly alter your settings to cater to the surroundings, some DSLR cameras offer you the option to create presets. On a Canon EOS 5D Mark III and Mark IV, you are able to pre-make your own settings when practicing beforehand and save them, making it easier to manage lighting situations.
Often, DSLRs will come with other modes on the dial. However, the ones we discussed are the main ones to worry about, especially when it comes to events.
If you have a Canon camera, you can learn how to do this and purchase a bundle in offer here.
Auto Mode
Unless absolutely necessary – stay away from Auto mode. Auto mode allows the camera to analyze and control all the settings on your camera when you capture your image. This may sound like a dream to most, and the most efficient way of shooting – however, it has its major downfalls. Shooting on Auto is no quick fix for a photographer. Your camera will try its absolute best to select the correct settings for you with each photo you take. However, technology cannot get it right all the time.
From our own experience with shooting using Auto mode, it works pretty well when you have decent lighting, and your subject is standing still. However, as soon as your subject moves, or the lighting is a little low – disaster strikes. Auto mode can work out the aperture and ISO of an image pretty well, but as soon as it comes to shutter speed, it has a hard time. This results in extremely blurry photos if your subject is moving around a little more than your camera can handle.
Shutter Priority (TV Mode)
TV mode stands for ‘Time Value,’ but it is more commonly known as Shutter Priority mode. When capturing motion is the most important thing in your shot (whether this is to control motion blur for a sharper image, or to add motion blur), this setting will be most beneficial to you.
When using TV mode, you select your desired shutter speed, and your camera works to adjust the aperture depending on the lighting situation, in order to create a correctly lit shot. The shutter speed is the main focus, making it a great mode for sports events or for those times you want to get artsy and create a blur effect.
Aperture-Priority Mode (AV)
Aperture Priority mode is one of our favorites. Some professional photographers scoff at the thought of using AV mode, because ‘we should be good enough to know all the best settings for every environment.’ But the truth is – sometimes, in situations where the lighting is constantly changing, we need a bit of help. If your camera can take full control of the aperture (how much light is being let into your camera through the lens), and you only have ISO and shutter speed to worry about – why wouldn’t you take advantage of that?
My first few shots as a professional photographer were weddings. If I knew then what I know now about AV mode, my job would’ve been a lot easier!
Manual Mode
Manual mode is a great tool for both professionals and for someone building up their knowledge in camera settings.
Manual mode allows you complete control of all the settings in your camera, which you can control from both the menu on the screen and the small LCD display. It’s a great mode for when you’re shooting professionally, with very consistent lighting. However, as mentioned above, if the lighting is very versatile in the venue, or you are switching between an indoor or outdoor area very frequently, it can be tricky to keep up with the aperture.
Always practice manual mode thoroughly, before committing to using it in a big shoot, or important event.
Final Thoughts
Shooting an event can be difficult, as there are so many different types of events, with so many different venues, resulting in so many possible outcomes. However, as long as you take the right steps to prepare yourself and become friends with your DSLR, things will run as smooth as silk.
Take the time to get to know the surroundings you will be shooting in, bring a friend, and do a practice run of the night. Make sure you’re aware of event timings and know everything that will happen over the course of the day/night, so you don’t miss any big moments.
If you are shooting an event where you will be moving between different lighting situations, camera settings may be tricky to manage. As long as you have done a sufficient amount of preparation, you will do just fine!
Something to Read
Popular Photography Genres and Camera Settings
Check out this article to learn how to enter the world of event photography.


2 comments
free
Nice!
cuisine
Hi, its good piece of writing on the topic of media print,
we all understand media is a great source of information.