
Megapixels, megabytes, and resolution are confusing terms for someone new to technology or digital cameras. Often, they seem like they talk about the same thing, or people will use the words interchangeably. Unfortunately, that is not the case. Megapixels, megabytes, and resolution are all unique aspects of photos, and learning the difference can help improve your workflow and get you a better understanding of digital photography.
The differences between megapixels, megabytes, and resolution are best explained by going into what each one is on its own. Megapixels are a measurement of the size of a digital image and represent how many pixels there are in the image. Megabytes are a measurement of the size of a digital file, which can change depending on a number of factors. Resolution is a measurement of how many pixels are in a digital image and is closely related to megapixels, although resolution can also change.
The differences between the three are fairly subtle, and the average user will not need to know too many of the defining features of any of them. However, as a digital photographer, it can be extremely helpful to use the correct names to keep things clear and easy to understand. Diving further into some of the differences will make that a lot easier.
Megapixel on AmazonWhat Are The Differences Between Megapixels, Megabytes, and Resolution?
While each of the three is important in determining how a final picture will look, megapixels, megabytes, and resolution are each unique and often represent a different stage in the process of digital photography.
A quick way to think about each of the three is as follows:
- Megapixels represent how many pixels the camera can capture in an image
- Megabytes are the file size of an image, or how much space it takes up
- Resolution is how many pixels are in an image, and can change dramatically after editing if the photo was cropped or altered
As you can see, each represents a different idea or step in the digital photography process. Megapixels are really only important while on camera, megabytes are important for determining storage, and resolution is important when creating the final product.
Diving Into Specifics About Megapixels
Megapixels measure how many pixels a camera will capture in an image. This number is generally fixed, and a camera’s megapixel count, or MP, cannot be upgraded without getting a whole new camera body. One megapixel is one million pixels.
Modern cameras often have at least 10MP, or 10 megapixels, although this number can go much higher. 10MP means that the photos captured by the camera are 10 million pixels. This may seem like a lot, but that number is not as large as you may think.
The number of pixels in an image are calculated by determining the number of pixels on the height and width. For a 10MP camera, this generally means that the width of an image measures roughly 2,592 pixels, and the height measures 3,888 pixels. When you multiply these numbers together to create a rectangle, the resulting number, or total amount of pixels, is about 10 million pixels.
Consider that an average computer display is 1,920 pixels wide by 1,080 pixels high. A 10-megapixel camera image does not even double that, so the amounts are not incredibly high.
The higher a camera’s megapixel count, the sharper images will generally be. As stated, most modern cameras have at least 10 megapixels, and for many users that should be more than enough. Cameras often have diminishing returns on megapixel count simply due to many displays not having enough pixels to properly showcase high megapixel shots.
When considering how important megapixels are to your photos, consider where your photos traditionally end up. If they are seen digitially or on smaller prints, megapixels will simply not be as important. If you are taking photographs for billboards, large prints, or enormous digital displays with high resolutions, consider investing in a camera with a higher MP than normal.
Megapixels determine how sharp the initial image on the camera will be. As files become clearer and have higher pixel counts, the size of an image will also generally increase. This increase in size affects the megabytes, and while one influences the other, it is not a direct cause of higher megabyte counts.
What Are Megabytes?
Megabytes are a measurement of how large a digital file is. In relation to photography, this is often how much space a photo is taking up on a memory card or hard drive.
Megabytes are often represented with the acronym MB, similar to how gigabytes, another measurement of file size, is represented with GB. The larger a file, the more bytes the file takes up.
Numbers when it comes to storage can often feel inflated once again, as 1 megabyte is equal to 1,000,000 bytes. Bytes are incredibly small and almost never used for measuring file sizes anymore, so do not worry about them. Megabytes are very common, especially in photography, and most hard drives will be measured in gigabytes.
It can be helpful to think of a hard drive or memory card as a large warehouse. The warehouse can fit a certain volume of things inside of it. Different objects, or files, will take up different amounts of space. Once the warehouse, or memory card, is full, no more can be fit in. Managing how many megabytes a photo is is important so that you can properly store your images and accompanying documents.
Image file sizes can vary widely and will change depending on a number of factors. Top factors include:
- Resolution of the image
- Format the image is saved in
- Compression the image underwent
The resolution of the image can be thought of as how many pixels are present in it. The more there are, the larger the file will be and the more megabytes it will be. Generally speaking, it is best to save final images in the resolution they will be used in if space is a concern. If not, saving your images at the highest possible resolution may future proof them, but you can quickly run out of space.
Image formats can matter a great deal when it comes to megabytes. The two most common image forms are JPEG and PNG. While each has further options and tweaks that can save on image quality or size, the JPEG format generally produces smaller sized files. Another common image format is RAW, which results in the largest file sizes but also keeps quality the highest.
One of the final factors in megabyte size is image compression. Each image format can be saved with different tweaks, often resulting in more or less image compression. The fewer megabytes an image takes up, the less quality the image keeps. For instance, if a high-quality, lossless image takes up 1.6MB, a compressed image may take up significantly less but cause a drop in quality.
With modern hard drives reaching upwards of 1TB, or 1000GB, file size is rarely a concern for anyone who is not an enthusiast. Still, it is worth it to keep best practices for file size in mind so that your images stay as sharp as possible without causing a burden on your system.
Why Is Resolution Important?
Resolution is how many pixels are present in a digital image. At a surface level, image resolution is simply another measurement of megapixels. While this is technically true, there is more to it than that, and knowing some key specifics about resolution will help your images look their best.
When people talk about resolution, they generally are discussing the final size of an image. For instance, if an image is meant to be used as a wallpaper for a computer, saving the image at a resolution of 1920×1080 makes sense. While higher resolutions are possible, assuming the camera that took the photo had enough megapixels, it is simply not necessary in this case. When images are saved at a higher resolution than what the display can show, parts can be cut off or compresses later, ruining the original look.
The resolution of an image can be any size at or under the megapixels of the camera which took the photo. While it is possible to increase resolution above the megapixels of the camera, this will result in a significant drop in quality and is almost never worth it. If multiple images are being edited or stitched together, the resolution the image can be saved at can be as high as the total.
The necessary resolution of an image can change dramatically depending on a few factors. These include cropping, editing, final use, and other considerations that must be taken into account.
While working with an image, keep it in the highest resolution possible. Once the image is done being edited and ready for send-off, consider saving the image in a different resolution. This will ensure that the image looks the way you intended it to even if a client or viewer has a different display. In addition, higher resolutions take up more space on a hard drive, or more megabytes, and this can add up quickly.
How Many Megapixels Does My Camera Need?
When it comes to choosing the most important of the three, a lot is a personal preference. Each plays an extremely important role in determining how your images will come out, and paying attention to all facets of digital image production is vital to producing high-quality work.
With that said, the most important of these when choosing a camera is cut and dry. Megapixels are the most important of these three definitions when choosing a camera. Image size in megabytes can always be compressed and the importance of storage will likely be determined by a memory card, which is interchangeable between cameras. Resolution is also important, but that should be considered when editing the photos, which will almost certainly happen off-camera. Take a look at this article about the importance of Megapixels.
It is important to make sure that your camera can produce quality photos with enough megapixels. If not, some otherwise fantastic shots could be unusable simply due to being blurry or too small for any modern use. This generally will not be an issue with modern cameras, but if you are using early digital cameras, it is something to look out for.
Despite the importance of megapixels, the number of megapixels is not the mark of a great camera. You will get a better value per dollar investing in higher quality lenses and gear, rather than choosing the camera with the highest number of megapixels. Once you have hit roughly 10MP, all photos should be fine for most work.
Occasionally, photographs will need to be taken that can be displayed in enormous formats. At times like these, it is important to have even an even higher megapixel camera to take the photographs with. Situations where this can come up include:
- Printed photographs of all sizes
- Photos intended for large screens such as theaters or outdoor displays
- Photos where you will need to zoom in on a specific feature in post-production
All of these situations warrant grabbing a higher megapixel camera, as it can make images clearer at these large sizes or introduce more variety in post-production edits. As such, it is important to consider how your photographs will be most viewed or used when considering how many megapixels your camera needs.
Printed Photos
If you are planning on printing your photos, you very likely need a high-megapixel camera. This is due to a number of factors, but the most important one is achieving 300 PPI. PPI stands for pixels per inch and is a measure of how dense a photograph is. Essentially, this is the resolution of a photo and determines how blurry or clear the image is.
To achieve a clear print of a photo, the recommended PPI is 300. At any amount less than this, images become blurry and lose lots of detail. This is why, if you have ever tried to print an image off of the internet, it is likely that it came out blurrier than expected. Most images are exported and finished at 72 PPI, which works wonderfully for digital viewing but quickly becomes unacceptable for printed photographs.
In a slightly confusing turn, there is also an aspect of megapixels and resolution called DPI, or dots per inch. This is how many dots of ink a printer places per inch and is tied closely to PPI.
Due to the density of pixels required to achieve high-quality printed photographs, even small prints require a high megapixel camera. The basic formula for figuring out how many megapixels you need to print photographs at what size is as follows:
print width x 300 x print length x 300
This formula ensures that every inch of a printed photograph will have 300 PPI.
Using this formula, some common printing sizes need the following number of megapixels for quality prints:
| Size Of Print In Inches | Megapixels Required |
|---|---|
| 4 X 6 | 2.2 MP |
| 5 X 7 | 3.2 MP |
| 11 X 14 | 13.9 MP |
| 16 X 20 | 28.8 MP |
If in doubt, it is best to round up when looking at cameras to ensure that you meet the requirements for printing in the highest quality.
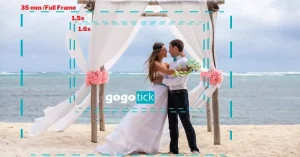
Large Screen Viewing
For large-screen viewing, higher megapixel photos are almost always worth it. This is less important than for printing out photographs as the viewing model is still digital, but the same reasons apply; it is important for photographs to be clear and crisp.
The megapixels needed for clear digital viewing are actually tied to the resolution of the display, rather than the size itself. Still, for most intents and purposes, larger displays will have higher resolutions. As it is unlikely you will know the exact resolution needed for certain displays, it is best to stick to high megapixel cameras while shooting.
This is likely the least common reason to need higher megapixel cameras. However, rare times it could come up include:
- Photos intended for museum use
- Photo documentaries shown in theaters
- Outdoor projections of photographs on a large scale
If you are planning on taking nature photos or other shots that may later be bought for uses such as these, it is best to be safe and use as high a megapixel camera you can.
Post-Production Zoom
For many photographers, the ability to zoom in on work and keep a clear photo is the best reason to invest in high megapixel cameras. The ability to zoom in clearly and reframe a photo in post-production can save photographs and help capture details more clearly.
While it is not a tool that most photographers want to rely on, the simple reality is that mistakes happen. Having a high megapixel camera allows for reframing and saving a shot, rather than needing to throw it away.
The reason a high megapixel camera is necessary for this is to ensure that the image does not get blurry. When reframing a photograph digitally, two things are happening. One, some of the photo is getting cut out, reducing the total size. Two, the image is being zoomed in on. Having more pixels in the photo, which only happens through higher megapixels in the first place, lets both of these things happen with no discernable reduction in quality.
This trick can be used in a variety of ways, even when not necessary. Details can be found and focused on that otherwise would be missed, or elements pulled out and repositioned without losing quality. As cameras have become more advanced and able to capture more detail, the number of changes available during editing has grown as well.
Being able to zoom in after the shot is taken opens up another avenue of creativity for photographers to work with and provides a great reason to invest in a high megapixel camera.
What Size Should My Image Files Be?
The size of image files changes dramatically depending on image resolution, format, editing, compression, and other factors. The general range for photograph sizes is 1 to 6 MB per shot. If you are using a professional format such as RAW, the average increases to 12 to 66 MB per shot.
When saving images or transferring images from the camera to a computer, it is highly recommended to save in the highest quality you can. The better the image quality, the larger the file size. As such, if you are doing heavy amounts of photography, it is likely worth it to invest in a large memory card and hard drive.
You should work in the highest image quality available during editing, so that most options are open to you. For example, in an uncompressed photo, it is likely you can zoom in and reframe a photo without losing quality. However, in a photo that has already been compressed to a smaller size, doing this same action could result in the photo becoming blurry and low-quality.
There are three important factors to consider when figuring out an image’s file size. These are:
- The size of the photograph
- The format of the image
- The compression of the image
Each of these has a significant effect on the size of an image’s file, and certain changes can be made at each level to allow for efficient use of space on memory cards and hard drives.
Photograph Size
Photograph size is one of the largest factors on image file size. The more pixels are present in an image, the larger the file size will be. This means that higher megapixel camera will produce files that are larger than other cameras.
There is little to be done to reduce the size of a file on this front until after editing. It is important to keep as many pixels as possible while editing and touching the photo so that many options are available. Once an image has been successfully edited, the resolution can be reduced to an acceptable amount for easier storage.
When considering reducing the size of an image, consider where it will live. If the image is to be printed, especially in large sizes, touching the resolution could be disastrous. However, if the image is intended to be viewed digitally or uploaded to a website, reducing the size to reasonable numbers is the smart thing to do. This will result in faster load times and allow for more images to fit on the hard drive.
Image Formatting
The format an image is saved in has the largest effect on file size. Some formats, such as RAW, are not intended for long storage due to how much space they take up. Instead, it is recommended to save original shots from the camera in RAW for editing. Once editing is done, saving the image in another format such as JPEG or PNG will allow for no real reduction in quality and much smaller file sizes.
It is important to change the format of images as necessary to allow for extra space or more editing power. It is best to save the final products in as small a file as possible while still retaining quality, and leave the files large before and during editing.
Common image formats include:
- RAW – saved from the camera, this format allows for the most editing but is unsuitable for finalized images.
- JPEG – the most common image format. JPEG loses some quality but is great for images meant for online use
- PNG – Another common image format. PNG files are lossless, so you can edit them without losing quality. They are fairly small file sizes.
- TIFF – the best image format for saving images to print. TIFF files are large and unsuitable for web use but save quality exceptionally well.
- PDF – Not exclusively an image format, PDFs are fantastic for easily sharing photos with others in a high-quality, easily accessible way. File sizes are small, as well.
If you have the space available, it is common to save images in two formats. Once in RAW, so that further edits and reformatting are always possible, and once in the format of choice. Be aware that this can quickly get out of hand if you are working with hundreds or thousands of photographs.
Image Compression
Finally, image compression can save thousands of bytes of space when done correctly. This aspect of file size is key to managing well, as files can easily be compressed too much and lose too much quality.
Many formats, such as JPEG or PNG, have options for how much quality should be kept while converting into that format. Often this is done on a slider between lowest quality and smallest file size, and highest quality and largest file size. What these sliders are truly adjusting is image compression.
Image compression is when a file is reduced in size by taking away pixels and details in the photograph. This is done automatically by programs with the intent to keep as much detail as possible, although it is inevitable that significant drops in quality occur as images are compressed.
Most often, this loss of quality shows up in the muddling of colors, feathering of edges, and blurring of backgrounds. For basic image storage or photographs that do not need to be saved in high-quality formats, compressing the image is one of the best ways to save on space and megabytes.


