
Capturing a good photo of the moon can yield some absolutely stunning images when done correctly. However, while high-quality pictures of the moon are incredible to look at, they’re also challenging to get. To take a good photograph of the moon, you need to know what you’re doing. Luckily, your camera won’t matter too much, as long as you follow the right steps.
How do you take good pictures of the moon? Taking a good photo of the moon can be done with any camera, and is easiest with a tripod, long zoom lens, and shutter cable. Use these camera settings for the best results:
- ISO 100
- Aperture between f/11 and f/16
- Shutter speed between 1/60th and 1/125th
Photographing the moon well can really be done with any camera, though it will be made much more difficult without some equipment to go along with it. Having said that, let’s go into some more detail regarding how to put the equipment and camera settings mentioned above to use when you’re out shooting the moon.
How Much Does Your Device Really Matter?
Some people may tell you that you need a camera worth thousands of dollars to get a high-quality picture of the moon. Luckily for all of you smartphone photographers out there, this is not true.
The same rules of standard photography apply to shoot the moon as well: any camera can do it, though there are noticeable advantages to using more expensive cameras. A costly camera designed for astrophotography will, of course, be much more apt to take good, crisp photos of the moon, but that’s not to say that a phone camera cannot do a decent job, too.
If you’re using a smartphone camera, you’ll just have to work a bit harder to get a good shot than you would if you were using more expensive equipment.
If you’re using a dedicated camera, like a DSLR, you’ll have a much easier time shooting the moon. Cameras like these are better able to pick up light than phone cameras, and they will produce sharper photos that have better color accuracy. Additionally, these cameras can be equipped with larger, more advanced lenses that phone cameras cannot, making it easier to use equipment to your advantage.
In summary, the device that you’re using does make a difference in how well the pictures of the moon that you take will come out. However, it is possible to take good photos of the moon regardless of the device, as long as you know how to do it.
Equipment to Use When Taking Pictures of the Moon
So, you have your camera ready, whether it be the Hubble telescope or an iPhone 8. Now, you have to pair that camera with some equipment. You can go out and take handheld photos of the moon, but doing so is probably going to produce images that are a bit less crisp than you would like. So, to make the most out of your camera, it’s recommended to use the additional equipment listed below.
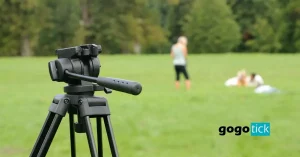
Tripod
If you’re going to pick one piece of equipment off of this list, let it be the tripod: Popular Photo cites a tripod as being one of the most critical pieces of equipment to bring along when shooting the moon.
As we mentioned before, taking photos of the moon while holding your camera in your hand will introduce quite a lot of blur. This will significantly reduce the clarity of the picture and add blur that can ruin a photo that would’ve otherwise been great had the photographer been using a tripod.
When using a tripod, the camera will be held much more steadily than you’re able to with your hand, eliminating any of the blur associated with handheld shots. Veteran photographers will probably already have a tripod, though smartphone photographers can pick one up for relatively cheap on Amazon.
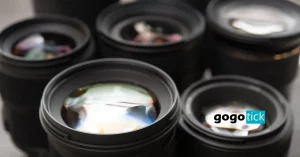
Long Zoom Lens
This piece of equipment is relevant only to the folks that have non-phone cameras, as most smartphones do not have interchangeable lenses.
However, if you have a camera whose lens can be easily swapped out, you’re going to want to use a long zoom lens when you’re shooting the moon. As we’re sure you’re aware, the moon is quite a long way away. This means that to pick up any level of detail, or to really fill the frame if you’re taking a close up shot, you’ll need a long zoom lens that can stretch out and pick up the detail on the moon’s surface.
When selecting the lens that you’re going to use to shoot the moon, Light Stalking recommends something that is 200mm or longer. Lenses of this length will give you the chance to achieve as much detail as possible.
Shutter Cable
This last piece of equipment is not quite as important as the previous two, but it will still help out a bit when you’re really trying to minimize camera shake. A shutter release cable allows you to take a photo without touching the camera. This is useful because, even with your camera on a tripod, pressing the shutter button can cause some minor shake, which can introduce blur into the image.
Using a shutter cable allows you to activate the shutter without having to touch the camera. What this means for photographers is capturing photos with the absolute least amount of camera shake possible.
Camera Settings to Use for Moon Photography
Now that we’ve gone over the additional equipment that will be most helpful for you to use when you’re shooting the moon, it’s time to go over how you should configure your camera to yield the best results.
For these settings to be helpful, it is first essential to go over the basics of exposure, as understanding this is important to know how to use it to your advantage when you’re taking pictures of the moon. For a more in-depth explanation of exposure, we’ll refer you to Cambridge in Colour, though the quick rundown is below.
Camera Exposure
There are three elements to a camera’s exposure:
- Aperture
The aperture is measured in f-stop values, which are expressed in the format of f/2, f/4, and f/11, as examples. The aperture is a description of the size of the opening in a camera’s lens. The larger the opening, the more light will be let in, and the more exposed, or brighter, the image will be.
Aperture is important to get right, as using the wrong one can result in photos that are either too dark, if the aperture is too small, or too bright and overexposed if the aperture is too large. Smartphone cameras generally do not have adjustable apertures, though most dedicated cameras do.
- Shutter Speed
Shutter speed is how quickly the shutter will open or close, or how long the camera will be exposed to light. Shutter speed is expressed in seconds, ranging from breakneck shutter speeds like 1/4000th of a second, to extremely long shutter speeds like 30 seconds.
Shutter speed can be adjusted to create motion blur or to freeze moving objects in place. For example, if you’re shooting a fast-moving car, you can use a rapid shutter speed to freeze everything in place. Conversely, you could use a slow shutter speed to introduce some motion blur.
The most common shutter speed for handheld photography is between 1/50th and 1/200th of a second.
- ISO
The last piece of the “exposure triangle,” is known as ISO. ISO is a measurement of how sensitive the camera will be to light and adjusting it will have a direct impact on exposure. However, unlike the above-mentioned elements of exposure, you will always want your ISO to be as low as possible.
Aperture and shutter speed often need to be adjusted to get the image that you’re looking for, but with ISO, lower is better. This is because higher ISO values will introduce noise into the picture, which significantly detracts from the quality of the photo. For this reason, ISO should never be brought up from its minimum level unless the desired exposure cannot be reached with the other two settings.
Those are the basics of adjusting a camera’s exposure. Extensive practice is the only way to master these settings, though this brief breakdown should be enough to get you started.
With an explanation of exposure now out of the way, let’s go over how to adjust these settings to get the best possible pictures of the moon.
Best Camera Settings for Moon Photos
For experienced photographers, the discussion of adjusting exposure settings probably tipped you off to the fact that we’ll need to put our cameras in manual mode. However, for photographers who are inexperienced with cameras, this is an important tip to mention.
The first thing that you’ll want to do is put your camera in full manual mode. This will allow you to independently adjust all the settings mentioned above, giving you maximum control over the final image.
- Adjusting Aperture
Photography Life, the best aperture to use when taking a picture of the moon is f/11. We’ve seen and heard others who recommend apertures of up to f/16, though, so play around with your camera and lens setup to find the aperture that will work best for you.
Different cameras and lenses react to individual apertures differently, so the best aperture for shooting the moon isn’t as easy as just spitting out an f-stop number. However, the f-stop number that you’re looking for will likely be between f/11 and f/16.
- Adjusting Shutter Speed
The shutter speed that you’ll want to use when photographing the moon is likely going to be around 1/100. Adjusting shutter speed when using a tripod, shutter cable, and shooting a non-moving object becomes less important than it is when hand-shooting. However, getting the shutter speed right is still crucial in having an image of the moon that is properly exposed.
- Adjusting ISO
As you may have expected, adjusting ISO when taking pictures of the moon is a similar exercise as it is when shooting anything else: set it at the minimum level for your camera, and adjust as needed.
It’s likely that the minimum ISO level will be just fine when photographing the moon, and you should do this first before trying anything else. However, if you find that your exposure is off, and you can’t fix it using the other settings, go ahead and adjust the ISO as needed.
These are the basic camera settings that will work best for basic shots of the moon. Most importantly, these are settings for shots of the moon that do not include any sort of foreground. In other words, these are the settings to use when the only thing that will be in your image is the moon itself.
If you want to shoot the moon with an interesting foreground, adjusting camera settings is something that only you alone can do, as every foreground* will be unique. However, foregrounds aside, try out the above camera settings for general moon shots.
*A note about foregrounds: if you come across an image that has both the moon and foreground properly exposed, it’s probably a composite image, so don’t bother trying to replicate it outside of photoshop.
Choosing the Right Image Format
Now that you’ve figured out how to set up your camera’s adjustable settings to photograph the moon, you may be eager to run out into the night and start snapping some pictures. However, there is one, often overlooked adjustment that you should make to get the best possible photos, and to allow the most room for post-processing to make your pictures really pop.
This is, of course, choosing the correct image format. Many cameras will default to JPEG, and this is ok for simple point and shoot images that you don’t plan on editing too much. However, when you’re working with a subject as intricate as the moon, and when you’re playing with exposure settings as much as you are, taking a picture as a JPEG simply will not get the job done.
Instead, when you’re taking pictures of the moon, you want to be shooting in RAW. RAW images include much more depth and color accuracy and have a lot more data than JPEG images. This means that RAW images are much larger files, but they are also much better in the editing room.
JPEG images are somewhat auto-edited as soon as you take the photo, but RAW images are precisely what the name would suggest: raw. Shooting in RAW doesn’t change the photo from what your camera sees at all, giving you the control over the final product when you start editing your pictures.
Special Considerations for Smartphone Photographers
All this discussion about image formats and exposure settings may have made the smartphone photographers feel a bit left out, and understandably so. For most casual smartphone photographers, adjusting exposure settings and changing the image format is something that is probably thought of as an impossibility. However, this is not true, as smartphones can do all the above-listed things, except adjusting aperture, as we mentioned earlier.
The only stipulation is, you’ll need to, in most cases, download a third-party app to do this. Some phone standard camera apps are able to do these things, though many are not, which requires users to download a third-party app.
The absolute best third-party photography app is Adobe Lightroom. Lightroom is free to download, although there is a paid version that offers more features. However, the free version will allow you to do all the adjusting mentioned above, so unless you want more flexibility while editing, the free version will suit you just fine.
Lightroom is fantastic because it allows you to switch your smartphone’s camera into manual mode, giving you full control over the shutter speed and ISO. You can then adjust these to the settings that we discussed above to take great pictures of the moon with your device.
In addition to adjusting the exposure settings, though, Lightroom also allows you to shoot in RAW format right on your phone. This is an extremely beneficial feature to have, as it brings the RAW format, which was years ago exclusive to digital cameras, to smartphones. This means that even smartphone photographers will be able to edit their photos with the same flexibility as photographers using more advanced cameras.
Finally, Lightroom brings with it the benefit of being a mobile editing studio, as well. You can edit your photos, albeit limitedly with the free version, within the Lightroom app. This means that you can snap a few pictures and immediately start editing them if you’re anxious to see the final product’s potential before wasting time getting more photographs.
Veteran photographers will be able to judge a photo’s post-processing potential as soon as they shoot it, but for inexperienced photographers, this is a fantastic feature to have.
In summary, downloading Adobe Lightroom on your phone allows you to:
- Adjust ISO and shutter speed
- Shoot in RAW format
- Edit photos right on your phone
These added benefits in tandem with the fact that Lightroom is free to download make it an absolute no-brainer for the people who are looking to get the absolute most out of their smartphone’s camera.
Choosing the Correct Time and Location to Shoot the Moon
Now that you’ve got all your gear sorted out, and are confident in your ability to adjust your camera to get the best photos of the moon possible, you’re ready to get out there and start shooting! This can be exciting, and it may be tempting to just stroll into your backyard the next time the moon is out, but this will not yield nearly as good of an image as those that will be captured at well planned times and locations.
Picking the right time and location to shoot the moon is arguably more critical than it is for other types of photography, as taking pictures of the moon brings along several unique lighting challenges that are absent in other types of photography. For this reason, it’s essential to know when the best time to shoot the moon is, as well as the best location to do it from.
Best Times to Take Pictures of the Moon
Choosing the right time to shoot the moon will depend on the type of photo that you want to get. If you want to get a picture of the moon when its detail is the greatest, you should be going out when the moon is at its highest point. Finding out when the moon will be highest can be done easily using several different moon-tracking apps or websites.
However, if instead of capturing the most detail, you’re trying to get a shot of the moon rising or falling, you’ll want to pick a time when this is happening, of course, but also when ambient light is lowest.
This is a balancing act that only you can judge during the moment, but it’s an important one to do. If you want to shoot the moonrise, you’ll want to be able to capture as much detail in the moon itself as you can, so you’ll want to shoot when the moon is as high as it can be. However, you’ll, of course, want to snap your shot when the moonrise is happening, so you can’t wait too long for the moon to get high; otherwise, you’ll lose the moment. It may take a few nights to get this right, but the results can be quite spectacular when you do.
In summary, choosing the right time to shoot the moon is entirely dependent on what you want to get out of the shot. However, if detail is what you’re looking for, as most people are, let the moon get to its highest point.
Best Location to Photograph the Moon
Choosing the right location from which to take pictures of the moon is just as important as choosing the right time. Selecting the proper place to shoot the moon is often overlooked, as you don’t need to travel to the subject as you do for most other types of photography.
This can lead people into believing that they can just photograph the moon from their backyard, but in most cases, this will not work very well. Overlooking the location from which you’re shooting the moon can make doing so much harder than it has to be.
Location is vital in this instance because of light pollution. Light pollution is the enemy of all astrophotographers, and since you’re an astrophotographer now, it should be your enemy, too! This is because light pollution, or any light that is coming from anything other than the moon itself, will flood your camera and hamper its ability to pick up detail on the surface of the moon. This will make your pictures come out looking grainier and noisier than they would have if you were photographing from an area with low light pollution, as you should be.
So, in today’s modern age, when every other piece of land seems to be lit like a Christmas tree, how does one find a place with minimal light pollution from which they can successfully shoot the moon? Unfortunately, if you live in a city, you’re going to have to do some traveling. Even at nighttime, city lights will still be far too bright for you to get any decent pictures of the moon.
However, if you live in a smaller town, or even better, a rural area, finding a place with low enough light pollution probably won’t be an issue.
The easiest way to do this is, unless you know of a very secluded area off-hand, to use Google maps. Go onto Google maps and find your house (or wherever you currently are) by typing in your address. Then simply zoom out a little bit, and look for areas with the fewest number of roads and houses, and that is as far away as possible from metropolitan areas. These will be the areas with the lowest amount of light pollution.
If you want to get mathematical, the best location will probably be the equidistant from any major metropolitan areas, as long as there’s no additional light pollution in that spot. In other words, get away from those cities!
*
The above are some starting guidelines for finding the best time and location to take pictures of the moon. These recommendations may not suit everyone’s goals in shooting the moon, and you may need to adjust the time, and in rare instances, the location, to get a good shot. However, these guidelines will work well for most budding astrophotographers who just want to get a full-framed photo of the moon with detail.
Final Thoughts
Taking good photos of the moon can be a very complicated thing to do, and getting it right requires quite a bit of planning, time, and of course, know-how. Saying that can make it seem impossible, but this is, of course, not true, even if your only camera is the one attached to your phone. For most people, the tips mentioned above will be enough to get you well on your way to a clean, crisp, full-framed photo of the moon.
See this article to find out if it is worth buying a photo-printer, and this one to free a stiff lens in case you find yourself in these circumstances.


