
Hosting any type of event will be filled with details; however, hosting a college photography event will create its own entire unique set of responsibilities. You can host an exhibition, a competition, or a workshop to teach others what you know. There are countless possibilities for a photography event, but you must first consider the university’s needs or you might not even gain approval.
How to organize a photography event will involve logistics such as:
- Determining the goal for your event
- Gaining approval from the college
- Establishing a team
- Selecting your ticketing software
As well as basic event-planning skills such as arranging for:
- Marketing and promotion
- What to do during the event
- Follow-up post-event
We’ve created a blueprint so you don’t have to guess your way through it. Use this guide to cover every step along the way for organizing the most successful photography event on campus! You may need one of these bags to comfortably transport your equipment around campus.
How to Organize a Photography Event in College
Before heading into this, realize that it’s a massive undertaking with many more details than you may assume. Not only are you trying to stand out against other events occurring simultaneously on campus, but you’re also going to have regulatory powers to convince before you can even advertise your event.
You’ll have to build enough excitement for:
- The event to be approved by the college/university
- People to want to RSVP
- Actually getting people to attend
Luckily for you, we’ve cultivated the best tips from experts such as:
- College students
- Faculty/Professors
- Professional Marketers
- Event Planners and Coordinators
- Photographers and Exhibitionists
- Determining Your Goal for the Event
The purpose of your event will dictate every subsequent decision made from here on out.
You must approach your ambitions critically and look at the:
- Logistics – Can you afford XYZ?
- Possibility – Can we fit X amount of people in X location?
- Practicability – Will the campus likely approve this kind of event? Or is it a long-shot?
- Short-term goals – How do I get people to this type of event?
- Long-term goals – How do I follow-up with them and reach my ultimate goal of achieving XYZ?
There are so many ideas for a photography event. You can get as creative as you like and take liberty with these concepts, but some ideas to get you started for possible event-themes are:
- Photography Competition – This could include:
- ‘A Photography Scavenger Hunt’
- ‘Selfie-Contest for Hallows Eve!’
- ‘Night Photography Challenge’
- ‘Photofilm Contest’ – (Creating a series of images that depicts a story)
- ‘Short Film Contest’
- A game to see who can take the most pictures of XYZ? (The color yellow, monkeys, triangles around campus, get creative!)
- Photography Workshop – Concepts such as:
- ‘How to Take Better Photos’
- ‘Beginners Workshop’
- Seasonal themes (such as ‘Spring Photography Workshop – Snapping Florals Around Campus.’)
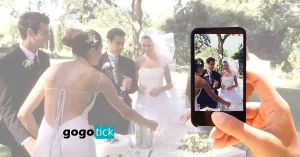
- ‘How To Photograph an Event’ (or How to Photograph a:
- Wedding
- Concert
- Flower field, etc.)
- ‘How to Approach Macrophotography’ (when small things look large through angle manipulation)
- Something related to your college and school-pride
- Corporate Event
- ‘Training to Be a Professional Photographer’
- ‘Networking Event for Creatives’
- ‘Printing Exchange’
- Charitable Event
- ‘A Night of Photography for XYZ Cause’
- ‘Give Back to Our School’ – (Certainly could help with getting your event approved if the proceeds go back to the University)
- An Exhibition
- ‘Black and White Night’
- ‘Vintage Photography – Throwback Thursday’
- Maybe if it’s Winter and everyone’s missing Summer days, you could host an exhibition centered around tropical destinations and warmth.
Questions to Ask Yourself
Read your audience and attempt to assess their needs. Questions to ask yourself are:
- What do I want this photography event to do for these students? Perhaps to:
- Grow their photography abilities?
- Give them a fun night of entertainment?
- Network and link them with other professional creatives?
- To enroll in your photography class?
- What do I want this photography event to do for the school? Perhaps to:
- Increase recognition for the Photography department?
- Provoke and market for increased enrollment?
- Offer funding to a particular department, charitable cause, need, etc.?
- What do I want this photography event to do for yourself? Perhaps to:
- Establish yourself as a Photography leader on campus?
- Network with fellow creatives?
- Add event management and extracurricular activities to your resume?
- Build school spirit?
- Getting Approval for Your Event
The main thing to consider is:
Does this align with the college’s reputation and code of ethics?
If you’re creating anything that could risk bad press, your event will likely be denied.
You should avoid getting too far along in your planning until your event has been approved. You don’t want to get everything ready for the school to say no, so make gaining approval one of your first steps.
Show up with well-orchestrated concepts and be prepared to answer questions about your event as well as its goals. An excellent place to start will be speaking with the Head Professor of Photography Department. Since each campus will be different, start here and they can advise you about the higher-ups you’ll need to reach for event-approval.
If you have a professor on your side to vouch for your event already, this will help significantly. Getting teachers and other students involved in the event will make it a larger-scale occasion that everyone enjoys more because they feel included in the stakes of this event.
Some ideas while you’re getting approval are:
- Some professors may even offer extra credit for hosting an event if this is in your area of study.
- You can also try to convince them to offer free extra credit or bonus points to all students that attend this event – Which can hugely increase your turnout!
- Ask your professor if they would consider making the event mandatory for all photography students or even certain upper-level classes.
- Building Your Team
Once your event is approved, it’s time to get organized!
Building your team can be centered around choosing people that:
- Are already interested in photography or studying it
- Are willing to work for extra credit (if feasible)
- Volunteer commonly for school events (photography-related or not)
- Enjoy planning an event
Having a reliable team of dependable people can make or break your event. You can’t do it all yourself, so proper delegation will be necessary. You will want people that are willing to do their share and that you trust.
Ways to find team members are:
- Post on social media – With more than 98% of adults age 18-24 using social media, this is the best way to reach this age group.
- Post flyers around Campus – Don’t only post flyers in the Photography department. You could be missing out on other departments and those interested in event planning. There could also be people that have never tried photography but would love to practice with it. Be sure to post flyers all around campuses and dormitories to reach people of all interest groups.
- Hold a Recruitment Drive – Get the department and professors involved to cultivate the best possible team selection for your intent.
We recommend recruiting a few back-ups or additional team members then you may assume you need, just to be safe. You don’t want to risk the success of your event because people drop out or things come up. Essentially, you should not become too dependent on any one team player.
Delegating Responsibilities
The more people that you can get involved – the better! This allows word to spread across the campus more easily by word of mouth. If someone has an integral role to play in the event, then they will tell their friends, they’ll tell their friends, and so on the ripple effect will go.
Since you’re trying to get as many people involved as possible to increase the connection they feel to the event, our advice is to:
- Gather a key staff of 5-10 that are your core members
- Try to recruit 10-15 extras for smaller tasks such as setting up chairs beforehand
Any emotional connection that the team feels concerning the event – will assist in the overall turnout.
You can delegate by understanding and communicating each person’s core strengths. Allow each member to add their input on where their talents would be best utilized, such as a:
- Financial Guru – to budget
- Extroverted Salesperson – to promote
- Interior Decorator lover – to decorate
- Platforms to Communicate with Your Team
Communicate with your team on platforms where everyone can openly edit and have access to the planning files, such as:
- Google Docs
- Asana
- Teamweek
- Monday
- Slack
Communicate often with scheduled meetings that increase as you near the event date. You’ll want to be certain that everyone knows their distinct:
- Role/responsibility
- Deadlines
- Budget
- Point of contact
- Budgeting
Depending on how you plan to orchestrate your event, you may need very little funding at all. Factors to budget for include but are not limited to:
- Paying your team (volunteer work is more common for college students)
- Food for your guests
- Entertainment or a performer
- Your ticketing software
- Décor
- Activities during the event – Such as:
- Camera rentals (Perhaps the photography department can loan you all equipment necessary).
- Back-up batteries/memory
- Any scavenger hunt/printed goods
- Frames for exhibition, etc.
- Unforeseeable and extra funding as an emergency cushion (just in case)
You will need to multiply these funds by how many people RSVP or that you presume will attend.
The ways to gain more funding and increase the assets you have to work with are:
- Seek out sponsors – Go around to local businesses (on and around campus). Describe the event to them and how you’ll use their funds, but the focus should be on how you will promote their It’s especially ideal if there is a photography-related business nearby that is willing to sponsor you. Keep the attention on what they have to gain from it, which will include:
- Exposure
- Recognition
- Hopefully increased business
- Find More Free Things – The average college student is $37,200 in debt. Free things are the best way to increase the assets you’re already working with while also taking advantage of a college student’s favorite word. Try to sell that your event will be giving away freebies such as:
- Raffles
- Gifts
- Free camera film
- Free food – The key to a college student’s heart that will greatly increase your turnout if properly advertised
- Whatever you are able to achieve at zero-cost
- Combine the Two – You can also ask your sponsors if there is anything that they would like to offer guests for free, even something as small as a coupon. This:
- Incentivizes people to attend your event for free stuff
- Gains more exposure for your sponsors
- Increases your sponsor’s profitability
- Is a win-win for everyone!
- Selecting a Venue
Choosing the setting for your event can be an enjoyable step in the process. This should be a relatively simple aspect that can be worked out with the Head of the Photography department.
Ultimately, the event should be on campus so that everyone can attend and easily access it.
If you want to have a tour that walks around town taking pictures, you should at least have the meeting-point be located on-campus. The rest of the event does not need to remain on campus, but for the beginning aspect while everyone arrives, you will notice a more massive turnout if it is convenient for your audience.
Make it easy for them, regardless of where you decide.
Some event-location-ideas to recommend when gaining approval for the event are:
- The school’s amphitheater
- An outdoor stage
- The library
- If there is an exhibition hall somewhere or gallery to be utilized
- Any well-known recreational area on-campus. This could include nature locations, parks, game rooms, etc.
Understand how logistics for your event will be altered by selecting an indoor versus an outdoor venue. Evaluate whether your type of activity would be best held in an indoor or outdoor environment.
Final Note – Always have a back-up venue in case your first choice is unavailable. Due to the fact that things rarely turn out just how we plan them – Attempt to have a Plan B. and Plan C. for almost every logistic included in this guide.
- Considering Other Logistics
Just a few of these to account for in your planning include but are not limited to:
- Any vendors you’ll need to communicate with
- Food
- Drink
- Entertainment
- If you are planning a Festival event that will be much larger than your typical event, you could consider accommodation options. All festivals must weigh this logistic to increase their turnout and increase participation.
- Lighting – Could be very useful in an exhibition where the framed work requires a spotlight, or in a workshop where you are teaching photographers how to use lighting equipment.
- Any sound systems required
- Selecting Your Ticketing Software
Now! Once all of these plans are arranged, you will know every detail that needs to be printed on your tickets. This is why you cannot take this step beforehand, and everything needs to be done in this order.
Once all details are in place (with contingency plans for your contingency plans) select a ticketing software. The ticketing software will be a digital means for people to gain access to your photography event. Choose a ticketing system that works with your cause and increases efficiency.
Each of these recommendations will include the amenities:
- Mobile-optimization (so people can purchase from their cell phone which is probable for this target audience)
- Secure payments (Even if the ticket is free, this can assist in tracking RSVPs and making your event more professional in appearance)
- Promotional tools
A few websites that we recommend utilizing are:
- Eventbrite – Top-rated and the most popularly used ticketing platform.
- Attendstar – Excellent for allowing your guests to preprint tickets. Attendstar will also assist you in marketing through email promotion. Also utilize their ‘Remind Me’ feature, which will text your guests as the event date nears.
- Evenium – Allows for you to import your own contacts, send the invitations to your closest contacts, and monitor how many have submitted their RSVP through this platform.
- How to Announce Your Event
As you can see, there are many details that need to be solidified before you can even promote your event.
Once people have a method for reserving the tickets (i.e., an established ticketing service), you can now (finally) announce to the world that you’re hosting a photography event!
When you announce your event, consider:
- The theme
- The goal for this event and how to communicate its importance
- What would convince this audience to attend?
- What would convince you to attend?
On the flyer, be sure that all of the following information is listed:
- The date and time
- The location
- What to bring (camera, film, if anything)
- How to dress (if running around photographing in the snow)
- The goal and how much fun they’ll have doing XYZ activities
Extra things to incorporate into your advertising are sales tactics such as:
- “Just bring yourself! We have all the cameras, film, batteries, and equipment that you’ll need!”
- “FREE PIZZA! First come, first serve, so arrive early!”
- “Bring your friends!”
- “FREE Ticket contest! Enter to win free tickets to this event by doing XYZ task.”
Build excitement and make it the kind of event that you would be intrigued to participate within. If it seems boring to you, it will seem boring to your audience because they are much less invested in the project than you are.
- Marketing Your Event
All of this work will be for nothing if no one shows up. You must market your event and promote it until you’re even sick of hearing about it. Guarantee that the audience that would attend this event is hearing word of it. The ways to do this are:
Market on Social Media – As mentioned, nearly 100% of this target age-group are actively using social media. Digital communication will be the ideal place to reach your audience, and you should utilize organic and paid advertisements (depending on your budget).
Spread awareness through the platforms of:
- Instagram (ideal for your photography-inclined audience)
- Facebook (use Live videos to get people excited)
- Snapchat
- Gogotick
You are looking for the platform that they spend the most time on, which for photography purposes should be Instagram.
Advertise with Flyers Around Campus – Ask local businesses if you can leave them here as well. Post the flyers around places that get the most foot-traffic for your audience. This may include:
- The photography department
- Any creative department on campus
- All dormitories
- Local hangouts like the go-to coffee spot or rec-room
Promote by Word of Mouth – Tell everyone on campus, tell them to tell everyone they know on campus and get the message around!
Email Marketing – Many of the ticketing platforms will offer this service. Email is a superb way to send people reminders one week out from the event, three days, and the day-of.
- Double-Checks Right Before the Event
There are many tasks that will be left until the 24 hours prior to your event taking place.
Some final checks to add to your to-do list before your event commences include:
With vendors:
- Communicate with all vendors and confirm arrival times for catering/refreshments/entertainment, etc.
- If any vendors cancel, this is the time to utilize your back-ups because you should always have a plan B.
- Confirm you have petty-cash on hand if needed
With your team:
- Communicate with your team to confirm that each member understands their role of responsibilities.
With Equipment and Supplemental Materials:
- Confirm all printed materials required are on-hand
- Test all audio and sound equipment for functionality
- If there are any videos to be shown or entertainment, have this on a backed-up file.
- Test all camera flashes, radio slaves, and sync cables
- Charge your laptop and cellphone to remain reachable
- Consider purchasing a back-up hotspot if internet signal is required on the move
- Clean all camera lenses (assess for any mold, chipping, breaks or damage that could ruin a guest’s images)
- Confirm all cameras are fully charged for a big event of snapping photos
- Always pack extra batteries and memory cards!
With Yourself:
A lot is going on during an event, especially for the host and creator of said event. Some things to keep on hand if you’re hosting an all-day event are –
- Water
- Snacks
- Comfy shoes for running around in
- Back-up outfit (in case you are sweaty from set-up prior to the event and want to change)
- Weather-practical clothing depending on occasion indoors or outdoors (should be noted on all invitations as well)
- Pre-pack everything the night before (all lighting, stands, tripods, etc.)
- Pen and paper (always good to have on hand)
Create a check-list of your own. Print out copies for everyone to have their own check-list the day of the event.
With Guests:
- Now is the time to promote the count-down to your event!
- Get people excited about coming out today/tonight and encourage them to purchase their tickets now before they’re all sold out.
- Tell them extra pizza if you bring your friends, incentivize people to multiple the turnout by bringing a plus one or five.
- Set a time that ticket sales will stop. Create a sense of urgency to encourage people to make a decision more quickly.
- Follow-up for the Event-Based on Your Goals
Congratulations! You’ve survived your first photography event, but the work is not entirely done. Now is the time to consider every goal you had coming into this project – and determine if these goals were met.
Some follow-up protocols to take post-event are:
- Leave the venue how you found it – Breakdown all frames, tables, chairs, and set the room back to its original status. A clean location post-event will be helpful in proving your responsibility as a leader.
- Back-up all photography files that were taken during the event. Back them up on a hard-drive or something physical (such as a flash drive) as well as a digital means (such as Google Drive, Dropbox, etc.) in case something happens to your physical file.
- Request feedback from your guests, sponsors, the campus officials, and your professors. There is something to be learned from every event you host and you will only get better over time through people’s constructive insights.
- Thank all participants – This can be done at the same time as the feedback request, with another thank you added after the actual feedback. Approach this post-event step with gratitude and people will be more likely to return to your future events.
- Review for yourself all:
- All guest and team feedback
- Final budget – ‘Exceeded by how much? How could we have improved this next time?’
- All vendor relations – ‘Could I get this cheaper from this vendor? Am I being charged too much for this service? Could any of these savings go back to the University?’
- The overall event – ‘What would I do differently? How can I improve?’
After you’ve established the event as a success, you should have no problem making it an annual campus tradition.


