
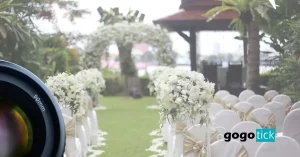
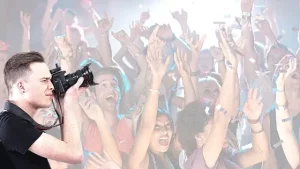
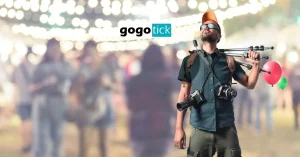
Photography is all about proper lighting, regardless of where and what you’re shooting. This is especially true of event photography, where you’re required to capture brief moments throughout what could be an hours-long event. For this reason, knowing how to get great shots at a low light event is an incredibly important skill to have, and some specific low light photography tips are very helpful in allowing photographers to develop this skill.
How do you shoot at a low-light event? Successful low light event photography is equal parts equipment, camera settings, and technique. Use a larger aperture, higher ISO, and as fast of a shutter speed as possible. Additionally, it helps to be patient with the lighting and to know the venue before you photograph there.
Just as is true with photography under proper lighting conditions, there is a lot that goes into low light event photography. Unfortunately, it is rarely as easy as adjusting your camera to let more light in, as doing so can introduce other problems even worse than a dark photograph. So, to help you avoid these mistakes, we’ll get into some tips that can help you take fantastic shots even in lighting conditions that are less than ideal.
Check out this bundle offers on Amazon
Do You Need Flash for Low Light Event Photography?
However, before we get into those tips, we need to address the most common question surrounding low light photography of all kinds: to flash or not to flash?
The short answer to this question is: it depends. Whether or not an event requires flash is entirely dependent on the lighting at the event. Some events, even low light ones, will have enough light that a flash is not needed. flash settings for event photography
This is generally preferred, as a flash is a harsh light that makes photos a bit less pleasing to look at. Other events will have such little light that you have no option but to use a flash. For this reason, no matter how much preparation you do, it’s best to show up ready to take both flash and no-flash photos, just in case.
If you do end up using a flash, be sure to do so wisely. Many photographers shy away from using flashes, but you should not be afraid to use it if you need to. However, first and foremost, do not be obnoxious to event-goers with your bright flash. Beyond that, though, it’s essential to adjust the flash, if possible, to suit the needs of the conditions. Studio Langford recommends using flash exposure compensation to dial in your flash.
In summary, whether the flash is necessary ultimately depends on the event and the lighting conditions at the event. Just know that you shouldn’t be afraid to use flash if you need to, as flash photographs can still turn out great if you do it correctly.
5 Tips for a Successful Shoot in Low Light
Enabling the flash your camera can help you take pictures in low-light conditions, but there are at least five other ways you can ensure you get pristine photos:
1.- Learn the Venue Before You Get There
While equipment and camera settings are incredibly important for low light event photography, learning the venue that you will be shooting is just as crucial. This goes for all types of event photography, but it is especially true for low light events because you’ll have to do some extra planning to get good pictures. There are a couple of different ways that you can learn the venue before your shoot.
Google is your friend.
One of the best ways to get a feel for the venue of the event before the shoot is to look up some photos of it online. Most of the time, there will be plenty of pictures on the venue’s website, but if not, google images may be worth a shot as well.
While you’re looking at photos of the venue, be very careful to pay close attention to how the lighting of the place is set up. Look for areas where lighting may be good, and focus on getting some photos there. Conversely, do your best to find out where lighting conditions may be sub-par, and avoid shooting at those spots as much as possible.
Look at other photographers’ work at this venue.
It can be beneficial to look at the work of photographers who have previously shot at this venue in similar low lighting conditions. Of course, all photographers will have their own style and will want to put their own spin on things, but looking at what other photographers have done with the lighting conditions can help give you an idea of what you may want to do.
Look for photos of theirs that you like, and make a note of approximately where the photographer and subject were positioned. Try to emulate that with your own unique flare when it’s time for you to take photos at the venue.
If possible, visit the venue before the event.
While looking at photos online as well as the work of other photographers is helpful, nothing will be as useful as seeing the venue in person with your own two eyes. This is by far the best way to learn the area before shooting it, giving you an idea of what lighting conditions you will have to work with.
Of course, this will not be possible in all cases, but if it is, you should absolutely give it a try. Seeing the venue and conditions prior to the shoot will be immensely helpful in bolstering your ability to adapt to the low lighting conditions that you’ll be forced to work with during the event.
Talk to the event organizer about the event.
If you can get a hold of them, it can be conducive to speak with the event organizer before the event about how the lighting will be set up. Looking at photos and even visiting the venue are helpful, but the state of the place in those instances may not match how it will look when the actual event is taking place.
For this reason, it may be a good idea to get in contact with the event organizer and ask them how the lighting will be set up at the event. If they have time to talk with you, you’ll likely learn quite a bit about where the light will be coming from, and what type of light it will be. This information can be immensely helpful as you prepare to take photos for the event.
2.- Use the Correct Camera and Equipment
One of the most critical parts of a successful low light shoot is using the correct equipment. More specifically, using the right camera, lenses, and accessories can be the difference between a shot being impossible to get and turning out beautifully. Equipment is not everything in photography, but it is vital, and that is especially true in low lighting conditions.
Having the right camera is a great place to start.
While almost any camera will work for low light event photography, it is undoubtedly quite a bit easier if you have a serious, high-quality camera.
- According to Digital Photography School, the best cameras for low lighting conditions will first and foremost be a DSLR camera.
- Secondly, the camera will need a full manual mode, allowing the photographer to take complete control over the exposure settings, which are very important in low lighting conditions.
- Additionally, the camera should have a relatively high ISO capability. ISO is used to increase the camera’s sensitivity to light, and this can be very helpful in low light conditions. Using a high ISO will introduce noise, but a noisy photo is better than one where you can’t see anything!
- A good camera for low lighting conditions can also shoot in burst mode. This is especially useful for low light events like concerts, where there may be flashing lights that are impossible to time correctly with just one shot. Having a burst function can make utilizing these dynamic lighting conditions much easier for the photographer to do.
- Finally, as most cameras can, an excellent low light camera will have the ability to shoot in RAW. Shooting in RAW allows you to pick up much more detail, and the colors are deeper and more true. This is helpful for low lighting conditions, as it will give you much more information to work with when you are editing the photos.
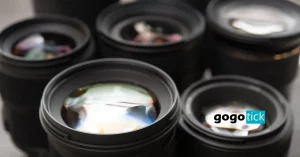
Make sure that you use the correct lens.
The lens that a photographer is using is one of the most critical pieces of equipment that they can have, and this is especially true for low light event photography.
The best lenses for low light photography will have a wider maximum aperture. This allows more light to hit the camera’s sensor, making the most that you possibly can out of imperfect lighting conditions. The following are good options to look into for low light event photography lenses:
- Canon EF 24mm f/1.4L II USM
- Canon EF 35mm f/2 IS USM
- Canon EF 50mm f/1.8 STM
- Canon EF 85mm f/1.2L II USM
- Sigma 18-35mm f/1.8 DC HSM
- Sigma 30mm f/1.4 DC DN
- Tamron A17E + Tripod
The above-listed lenses are all great options for low light event photography as a function of their large maximum apertures. Additionally, the above list gives photographers a wide range of focal lengths to choose from, meaning that you’re likely to find a lens that will meet the demands of your next event shoot.
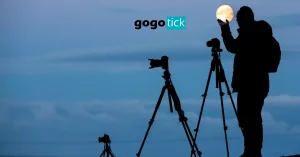
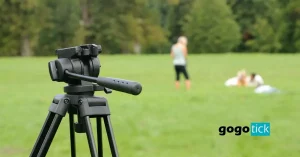
Consider using a tripod.
Using a tripod may not be possible at all events, but if you can pull it off, using a tripod can make a world of difference in low lighting conditions. Using a tripod is helpful because it will minimize if not completely eliminate any camera shake, which can be especially harmful in lower lighting conditions.
This is because low lighting conditions often require the use of a slower shutter speed, which can make the introduction of blur due to camera shake much more likely than if you were using a faster shutter in brighter light.
Using a tripod at an event can be difficult because most event photography requires the photographer to move around quite a bit to get a more diverse set together for the client. However, if there is time and space to do so, setting up a tripod can really help in allowing you to get some long exposure shots. This, of course, will not work if you’re shooting a crowd of moving people at a wedding—unless you’re going for motion blur—but if you’re trying to get shots of the inside of a dark venue, a tripod can be a fantastically helpful tool to have.
3.- Use the Correct Camera Settings for Low Ligh
One of the essential parts of low light photography is using the correct camera settings. Having your camera set up correctly for the lighting conditions will make the difference between dark, unusable shots and beautiful low light images. There are a few different adjustments to your camera’s settings that you should be using in low light, all of which are related to the three pillars of exposure: aperture, ISO, and shutter speed.
First thing’s first: put your camera in manual mode.
Before you can go about adjusting your camera’s exposure settings, you will first have to put your camera in manual mode. This is a very important first step to take, as the automatic mode will rarely work correctly in low light conditions. Using your camera’s manual mode allows you to take complete control over the camera’s exposure settings, allowing you to adjust everything as necessary to adapt to the lighting conditions appropriately.
If you’re a beginner or otherwise inexperienced photographer, it will be best to get comfortable with manual mode before shooting your low light event, especially if you’re used to using automatic mode on your camera. This is best done through practice, as most things are. Simply put yourself in a low lighting condition, and adjust the settings according to the below guidelines to get a feel for how each one affects the outcome of the shot.
Adjust the aperture for low light.
Adjusting the aperture on your camera lens is a significant thing to get right in low lighting conditions. Aperture is the size of the hole in your lens that allows light to pass through to the camera’s sensor, and if this hole is too small, not enough light will be transferred, and you’ll end up with a very dark image. This is especially important in low light conditions, as the camera will probably want as much light as it can get, through a larger aperture, to compose a beautiful image.
The opening is measured in f-stop numbers expressed as f/1, f/2, f/3, and so on. Most f-stop numbers will not be whole, though, and will be a number with a tenth decimal place, like f/1.8. The larger the f-stop number, the smaller the aperture, and vice-versa. For example, f/1.8 will have a larger aperture than f/3.
For low light event photography, How to Become a Rockstar Photographer recommends using an aperture of around f/1.8. This will be large enough to let enough light into the camera’s sensor for it to compose an adequately lit image.
Adjust the ISO for low light.
Another important piece of the exposure puzzle is ISO. ISO is a measurement of the camera’s sensitivity to light and is expressed in three-digit numbers with intervals of 50, typically ranging from 100 up to 2000 or more. ISO is interesting because its ability to increase your camera’s sensitivity to light is fantastic in low light conditions. This would make it seem that cranking the ISO as high as it will go could be a good idea to make the photo more well-lit, but this is actually not the case.
This will not work because as ISO goes up, so does the noise in the image. Increasing ISO will make a photo noisier, and decreasing ISO will conversely make a picture less noisy. This is why adjusting ISO is very much a balancing act between having a well-lit photo but an acceptable amount of noise. You can max out the ISO, but you’ll end up with a very noisy image, or you can use low ISO to reduce noise, and you’ll end up with a photo that is far too dark.
So, with these considerations in mind, it is recommended that an ISO of around 1600 be used for low light photography. Generally, the rule with ISO is that you should use the lowest number that you can to reduce noise, so if you find that you can use a lower ISO than 1600 and still have a good photo, then you should do that. However, an ISO of 1600 will serve as a good jumping-off point for most low light events, and you can adjust your ISO however you need to from there.
Adjust shutter speed for low light.
The final piece of the exposure triangle is shutter speed. Shutter speed is a measurement of exactly how long the camera will be exposed to the light, or how long the camera will take to “snap” the picture. Shutter speed is measured in seconds, ranging from 1/2000th of a second up to 30 full seconds. However, the most common shutter speeds are around 1/50th of a second to 1/1000th of a second.
Shutter speed is essential in the lighting of an image because it determines, in conjunction with aperture size, how much light the camera’s sensor will be exposed to. If the shutter speed is incredibly fast, the camera will be exposed to very little light. Conversely, if the shutter speed is very slow, the camera will be exposed to a lot of light. Finding the right middle ground, especially in low light conditions, is very important in getting a shot that looks good.
However, there is another consideration besides light that shutter speed has a direct and profound effect on: motion blur. If you use a shutter speed that is too slow, you will introduce motion blur into the shot. In some instances, this is desired, such as when shooting a fast-moving car when you really want to convey speed. Conversely, a quick shutter can be used to freeze moving objects in place. This creates a really cool effect with certain things, though neither of these compositional touches is all that relevant to event photography.
For event photography, you will probably want to avoid motion blur as much as possible, which will mean you want to use as quick of a shutter as possible while still letting in enough light.
With the above consideration in mind, it is recommended that a shutter speed of about 1/250th be used as a starting point at low light events. This may be too fast and not let in enough light, in which case shutter speed should be decreased. However, remember that as shutter speed goes down, so does blur, so keep it as high as you can while still having enough light enter the camera.
4.- Be Able to Work on the Fly
Being adaptable and dynamic is essential for any type of photography, but it is especially important for low light event photography. Events are dynamic by nature, and the continually changing conditions will always require you to be able to be quick to adjust to various situations.
However, being adaptable is even more important in low light conditions, especially as it relates to the adjustment of your camera’s exposure settings. It is tempting, especially for beginner photographers, to find a good exposure setting and keep it there. However, this usually won’t work well in low light conditions or in conditions where the lighting is constantly changing.
For this reason, it is a good idea to adjust your settings, take a few pictures, and then check the photos to see how they came out. This is how most photographers will work anyway, but this is even more important in low light conditions. Try to take no more than five photos without checking to see how they came out. After reviewing the images, you may need to adjust your settings slightly.
Being able to adapt to varying situations like this is an essential skill for photographers to have, and is especially important to a successful shoot in low light conditions.
5.- Be Ready to Spend Time Editing and Post-Processing
Post-processing photographs is a part of any photoshoot for all photographers, but it is an especially important thing to do following a shoot at a low light event.
At “normal” shoots where the lighting is perfect, post-processing is used to make images pop and give them a more intense, dramatic, or colorful feel depending on what you’re going for. This is true for editing a set from a low light event, too, but editing low light photos is also an exercise in fine-tuning the lighting of the image.
Ideally, you won’t have to do much to adjust the exposure while editing, because you’ll already have gotten it mostly correct by using the right camera settings. However, we can’t always get this lucky, and editing will be needed to make the photos look as great as they possibly can:
- In a lot of cases, you can do this by simply sliding the exposure up a bit in your editing software. This may over-brighten some areas, but this can be easily fixed using a brush tool in most cases.
- Other times, you may be better suited to increasing the shadows in the photo, bringing out some detail in the areas that are less well-lit.
- Finally, using noise reduction in post-processing can be very helpful in editing low light photographs as a function of these shots often being taken with a higher ISO. As we know, a high ISO can introduce noise into the photo, and using noise reduction can help to remedy this.
These editing strategies, in tandem with other aesthetic improvements, can help to make low light photographs pop.
Having said that, though, Poster Jack is wise in telling photographers not to expect post-processing miracles when it comes to dark photographs. If a photo is too dark out of the camera, no amount of post-processing can be done to bring it back to life, which is why it is always essential to get your exposure settings as correct as possible while you are shooting.
Final Thoughts
Low light event photography can be challenging, especially for those that don’t have much experience doing it. However, by using the above-mentioned equipment, exposure, and editing tips, you will be well on your way to a successful low light event shoot. Just be patient, and don’t try too hard to make shots happen if they don’t want to. With the right strategy and goals in mind, the right photos will come, and it will be very satisfying when they do.
Read this article on how to get into event photography, it’s worth it.


